


Sneak Peak of the Nursery and a Crib Sheet Tutorial
You may have long given up on seeing the nursery. I know, I promised a reveal over a year ago. And I can assure you, it is coming. It is unquestionably the sweetest room in the house. I still am so delighted that I got to do a girl nursery.
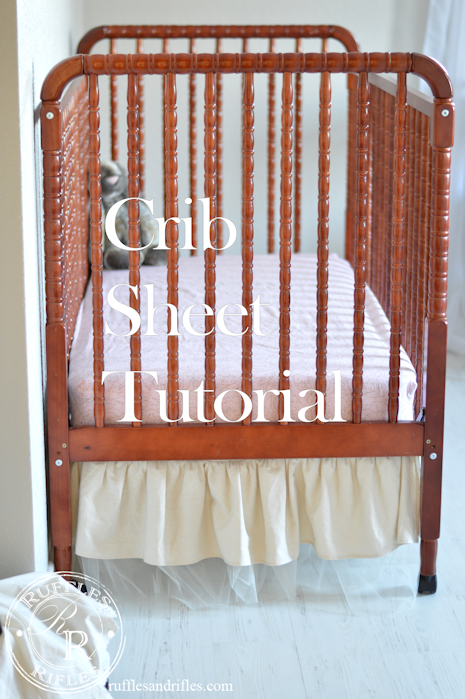
One thing I did in the process of making a very custom nursery both for my daughter, and our all of our sons, (see our last boy’s nursery here) is I made crib sheets. Sure you can by crib sheets anywhere. But with the all the safety these day of leaving a crib empty of blankets and crib bumpers, a unique crib sheet is a way to make a simple and practically safe statement in a nursery. It is also a super easy project.
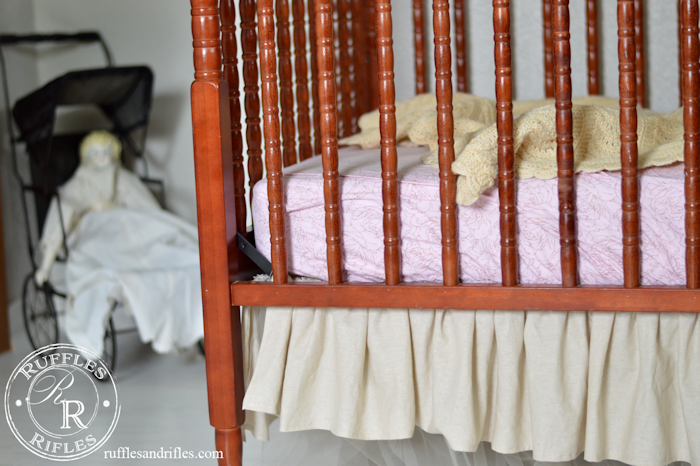
Here is another sneak peak of my sweet girl’s nursery. I love walking by the open door. It brings me so much joy. The soft femininity speaks not only my creative language, but it speaks of a story of a promise fulfilled. You can read more about the story of our daughter here if you missed it last year.
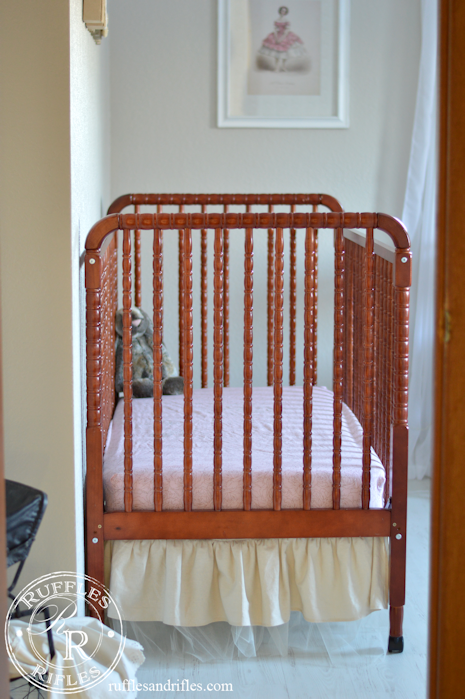
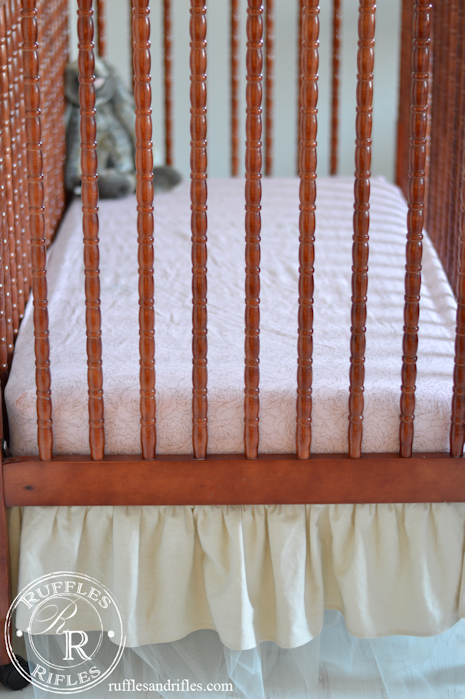
I made a couple of sheets, so we could always have a spare. I also made the tulle and linen crib skirt, simply because I had a girl, and I could. And that antique doll carriage, that makes my heart all giddy, it was my great grandmother’s. It’s over a hundred years old! Until recently, it’s sat there telling a story of little girl’s play for centuries. Now I have it hidden as my very mobile 12 month old doesn’t quite understand it’s value.
I also made the sheets for our sweet vintage boy’s nursery several years ago. You can see more of that here.
Tutorial – How to Make Custom Crib Sheets
What You Need:
sewing machine
fabric scissors
2 yards cotton fabric
thread
80 inches of 1/4″ elastic
ruler
1 small safety pin
- Cut your piece of fabric in a rectangle of 45 inches x 67 inches. (If the width is a little less than 45 inches, it will be fine.)
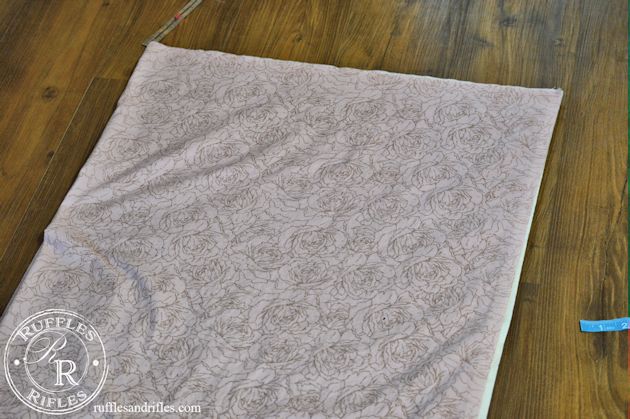
- Cut an 8in x 8in square in each of the four corners of the large rectangle. If you fold the fabric in half lengthwise, you can cut two layers at a time.

- Bring the 8in square piece to form a triangle. Pin and sew with a 1/4″ seam allowance.
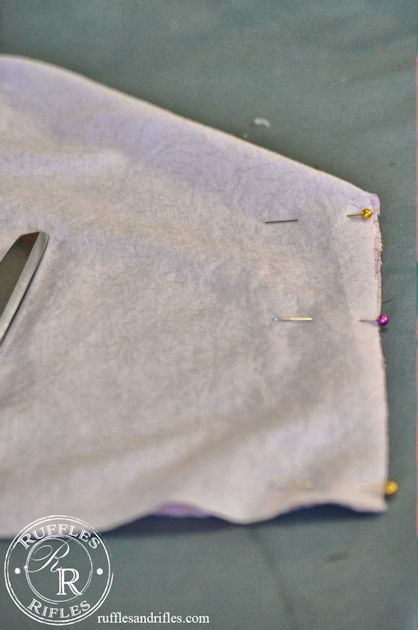
- Serge the edge for a professional finish. Do this to all four corners. Iron the finished seam to the left on all four seams (this will make threading the elastic much easier).
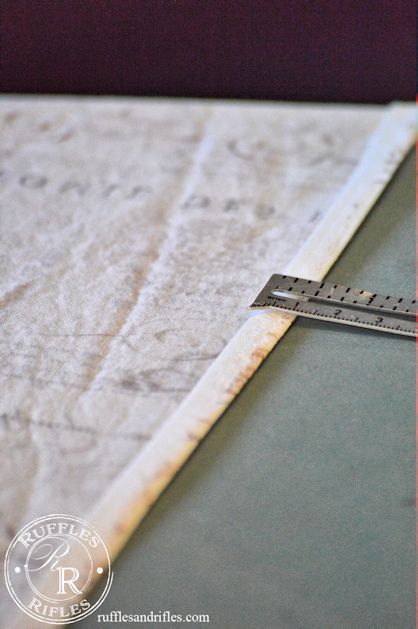
- Fold the raw edge around the entire edge under 1/4″. Fold under another 1/2″ and sew around the edge making sure to provide at least 3/8″ for the elastic casing. Leave an opening of 2″ to insert the elastic.
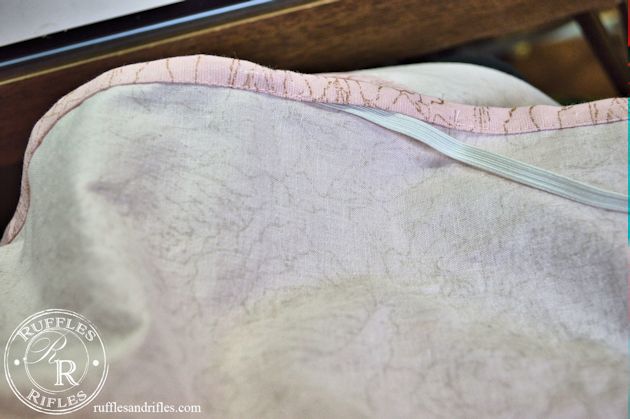
- Use a safety pin to secure one end of the elastic and thread through the casing to make the fitted sheet.
Sew the elastic together with a forward and backward stitch several times. Sew shut the opening. 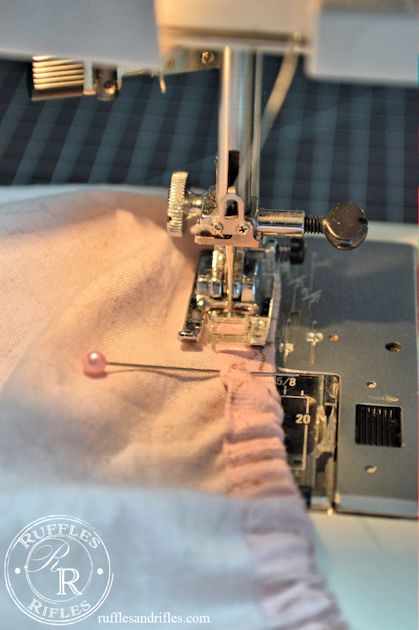
And you’re finished!
Bassinet Crib Sheet Measurements
If you would like to make bassinet crib sheets for a bassinet, or I used a bassinet mattress on my changing table, the directions are adaptable with smaller measurements.
Cut your fabric in a 26″x 39″ rectangle. Cut the squares in the four corners to be 6″. And use 40″ of elastic around the edge.
I hope you found the tutorial helpful. The full reveal is coming soon! I promise!
Cheryl
Hey! This is like the tutorial I have been waiting for (not that I need any more projects, thanks a lot!)! I have almost asked you in the past how to make these. I appreciate your tutorials so much because they give clear instructions without videos, which is what I prefer, because it just feels quieter and more restful to me to read and look at pics while I sew than to have to listen to and pause/play a video. And your projects usually apply to me and the types of projects I want to do. So thanks!
Well yay! I’m here for you. This is a quick project, really. 😉
Also, thank you for the feedback on the video vs still photo tutorial. I know I am behind, in not doing video tutorials, but I’m with you. I prefer the quiet so much more than a video. So that’s honestly why I do them. I’m glad someone else feels the same way! I’m reaching at least one person in this universe with my tutorials! Woo-hoo!
Thank you!
Cheryl
Great tutorial wish I would have seen this post for your boys’ last year. Would have saved myself hours of searching. I had such a hard time finding the colors I wanted. I would love to see how you did your ruffle bedskirt. Not sure if I can remember how to use a sewing machine(my sewing skills are super limited) but I think my mother in law could help me out. Thanks!
Thank you for the feedback on the tutorial. Sorry I couldn’t of helped earlier, but I guess that’s the way life goes sometimes. I don’t have a tutorial for the bedskirt. I was in a hurry to get it done before my daughter arrived and creating a tutorial slows down the process about tenfold. If your mother in law is a very experienced seamstress, she could probably look at photos and figure out how to make one. Simply put, I used 3 layers of tulle, with a shorter layer of linen over the top. I sewed all four sides to a paint drop cloth that rests under the crib mattress. Each of the four sides are only sewn to the top of the drop cloth, as to provide the slits for the skirt to hang around where the bed is attached to the crib. I hope that helps a little bit.
Cheryl