


Sneak Peak of the New Sofa, a Plethora of Pillows, and an Invisible Zipper Tutorial
I mentioned several weeks ago that we purchased an additional sofa for our larger living room in the new house. I had been looking for a while for a complimentary sofa that would provide more seating in the new space. Ideally, I wanted a French settee, that I could even reupholster. After looking for years (literally — and seeing a sparse smattering of expensive old settees that need work, but never a French looking settee) and then going to a local antique shop, where upon the shop owner laughed at me — because this is Alaska, and yeah, not gonna happen.
So, it got me to thinking about contentedness, and embracing where I am at. I live in Alaska. Not in Texas or the East Coast. Alaska, where an antique is something 50 years old, and if it is vintage or antique it is 3-5 times the cost it would be anywhere else the states. So I started looking for furniture differently, embracing Alaska (though not log style or moose or bears on my wall), embracing the fact that we entertain frequently, and perhaps a not so comfortable antique settee may not be the best.
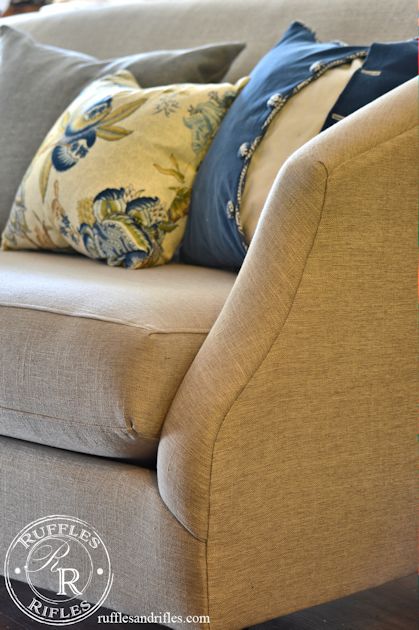
And so I found a high end sofa, a third of the original price on Craigslist. I thought about it for several days, and it was still there and the more I thought about it, the more I liked it. It had sweet, feminine curvy lines, and tan linen. At first I was going to make a slip cover for the sofa, because after all, I have 4 boys, but the more I thought about it, and read a timely blog post by Miss Mustard Seed about using the things you have, I decided to enjoy and use the gorgeous linen fabric (it has been professionally stain guarded as well). I had started the drop cloth slip cover, and it was just sad to cover such incredible fabric. So I decided, we will use the beautiful sofa as is. We got it for a third of the cost (although it looks new). I will continue to enforce the no food rule in the living room for the kids, and if it gets lived in and loved, well, isn’t that the blessing of relationships and family?
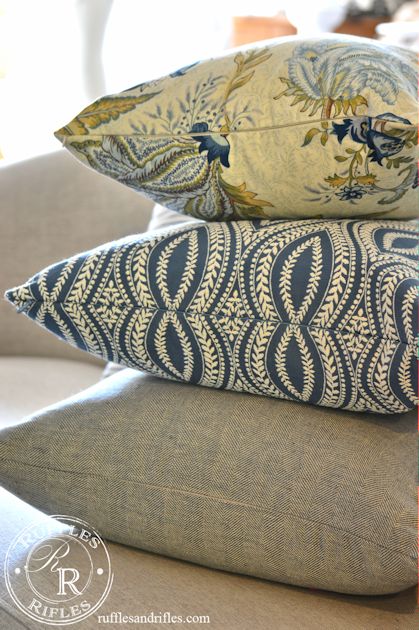
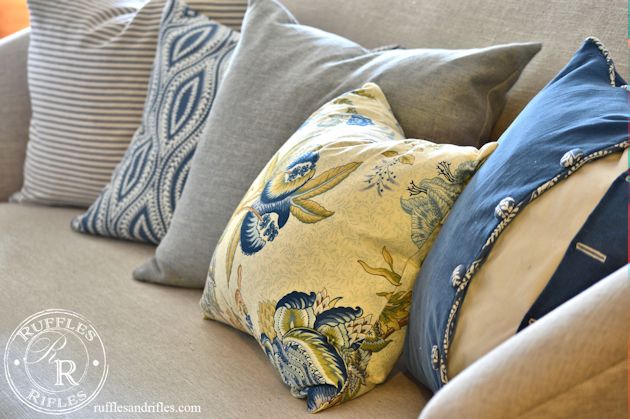
The sofa has been hanging out in my sewing room, until we move next week. It has a deep seat, so I knew immediately it would need a plethora of pillows. Eventually I’d like to get some European Grain Sack and pale French floral fabric for pillows, but I decided to use up what I had for now.
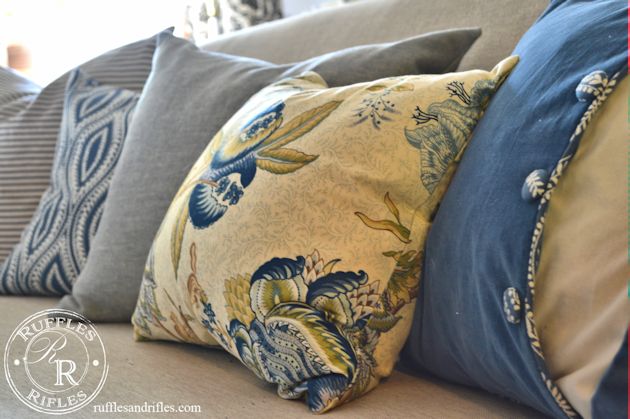
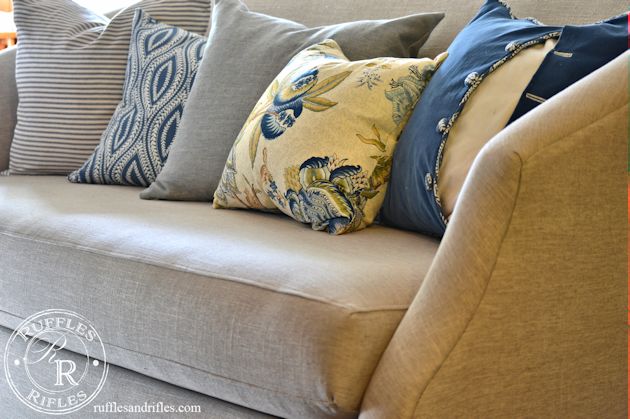
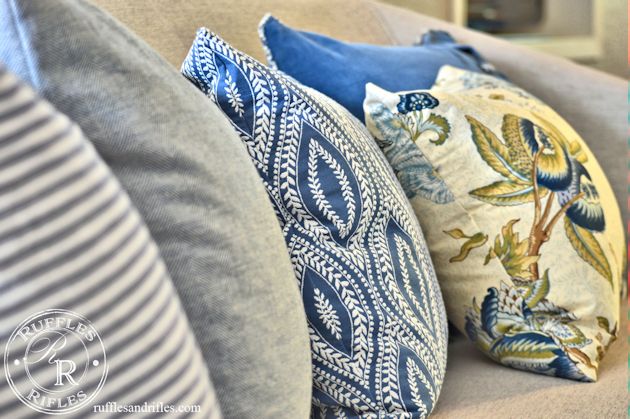
I like them all, kind of like a bouquet of blue fabrics, but my favorite is this blue and cream velvet inspired by old clothing.
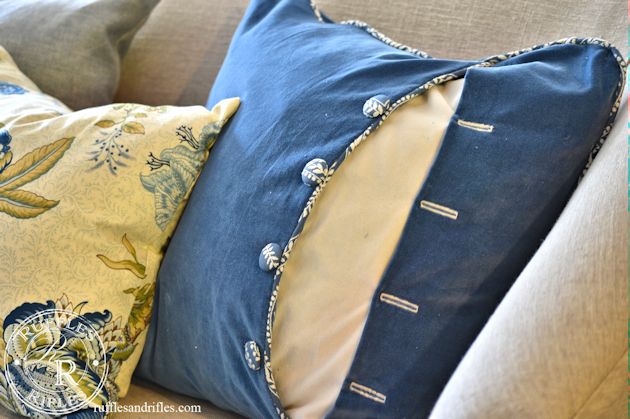
I mentioned in the green velvet pillow post that I was wanting to make a tutorial for installing an invisible zipper for making a pillow cover. They’re so quick and easy and great for changing out at the change of seasons, or change of style just because. If you would like know how, keep following along.
Throw Pillow Tutorial with An Invisible Zipper
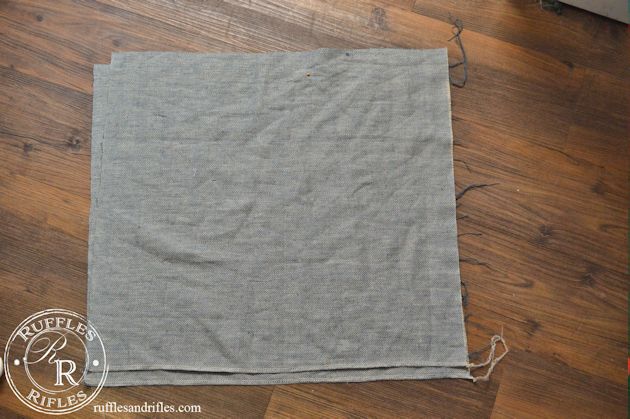
Measure your throw pillow. Cut your squares to the exact dimension. This was a thrifted Pottery Barn down insert, a 19″ square, so I cut two 19″ squares and serged each bottom piece separately.
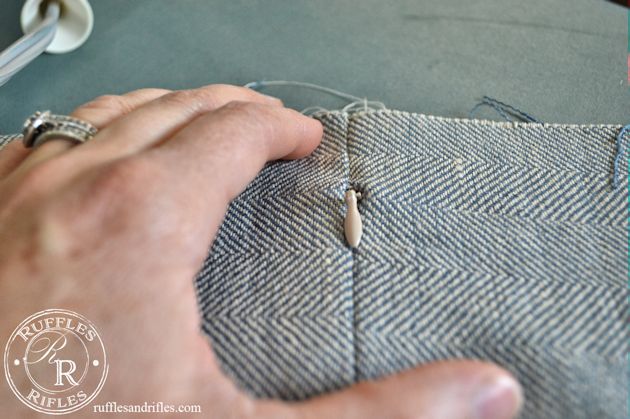
I almost always buy a 20-22″ length invisible zipper, because I can make it any length by sewing a new stop about an inch from the edge of the pillow. I hand sew the new stop in, with a simple up-down stitch.
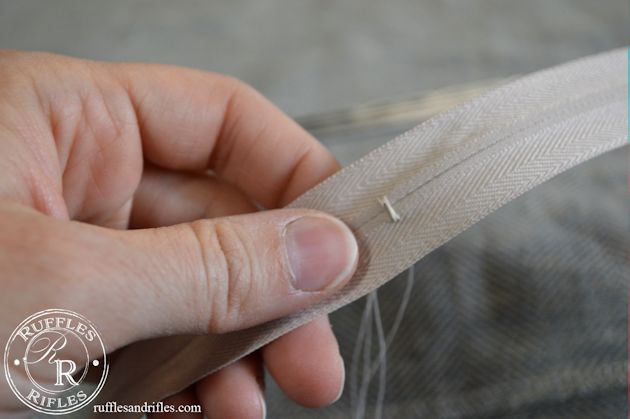
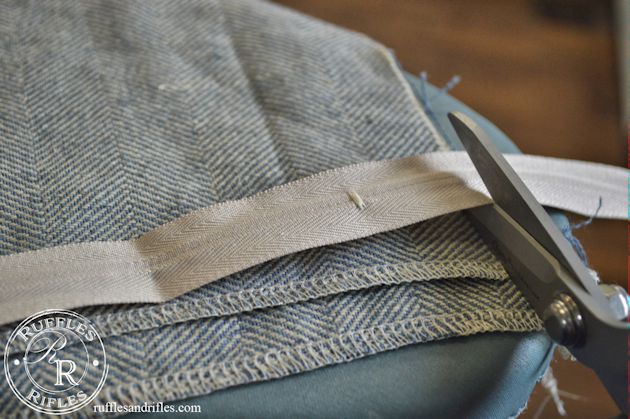
Trim the zipper to the length of the pillow edge.
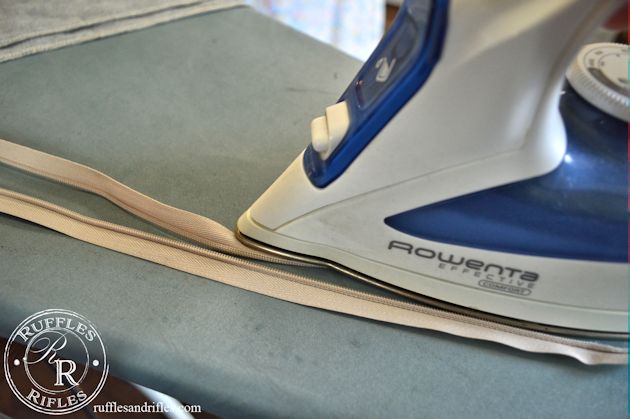
Next, unzip the zipper and flip it over so the teeth are visible on the top. Iron the teeth flat and away from the zipper tape so that the stitching can be closer to the teeth.
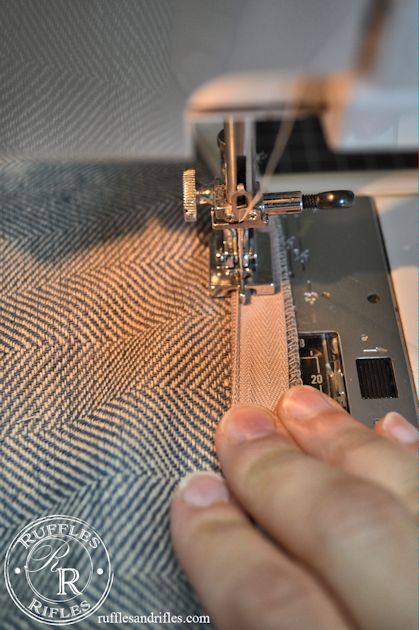
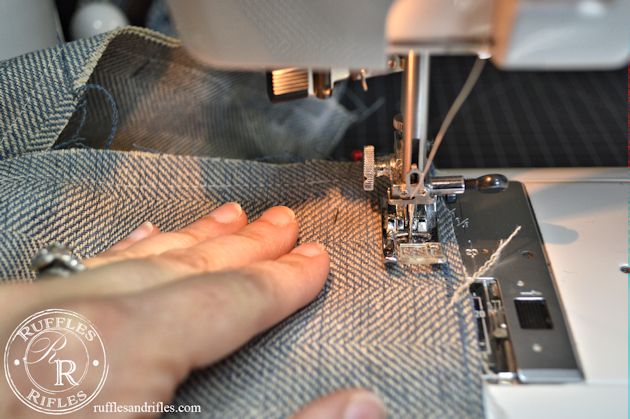
Next sew the zipper in with a 1/2″ seam allowance. If you have an invisible zipper foot, it makes an incredibly easy installation. I have put in countless invisible zippers with a regular zipper foot, and it works just fine, the invisible zipper just is that much easier. Make sure to lay your zipper down, right side of zipper (with the tab exposed) to right side of the fabric.
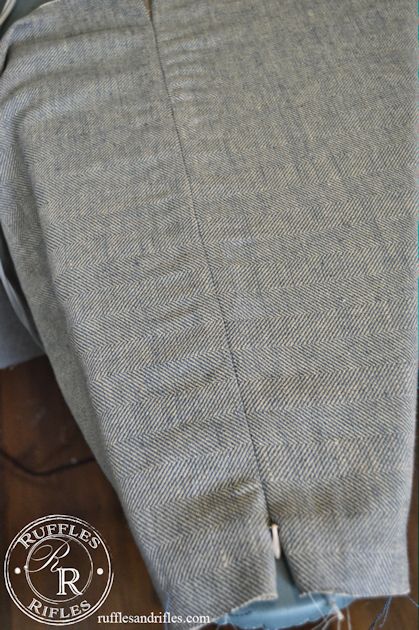
Sew in the opposite side of the zipper. The end result is just a beautiful looking seam.
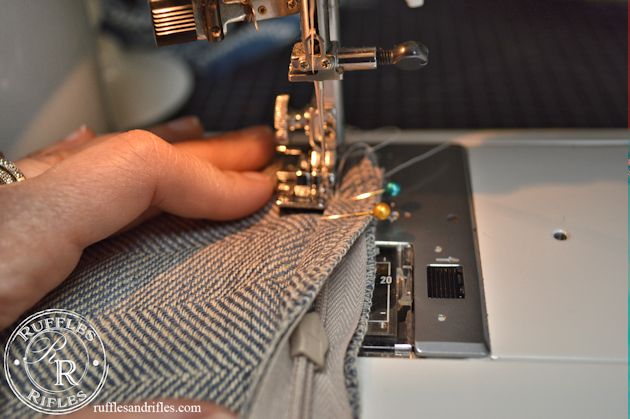
With a regular zipper foot, you will need to close off the top and bottom of the fabric below and above the start and end of the zipper. Make a seam from the edge to where the stitching starts on the zipper.

Then fold the pillow squares together, right sides facing. Be sure to open up the zipper a bit so you can get back in. Sew around the other three sides with a 1/2″ seam allowance. I also like to serge the three remaining edges
The beauty of invisible zippers, all you see is a seam and the mini zipper tab.
Thank you for stopping by, have a blessed day.
Cheryl
Sharing with:
This sofa is beautiful and it has great fabric! I know all to well the sofa dilemma up here. I’m battling the same thing right now. I did see a French settee on Craigslist today for $400. It needs upholstery and the back is tufted. The frame is in good condition and has nice patina. It’s so tempting, but is non-funtional for everyday use.
Your pillows are the perfect touch too.
I sent you a message through the contact link. I have an idea and wanted to see if you were interested and maybe had a few ideas of your own.
Thank you for sharing with Thursday Favorite Things too. 🙂
Thank you Olivia! I looked up the settee right away, because it’s always fun to look. 🙂 I don’t need another, nor do I have time for another project with the line-up of current projects. We are getting settled in to our new place, and I will be emailing you this week!
Blessings,
Cheryl
Well my new throw pillow doesn’t look quite as sharp as yours (my “invisible” zipper) but it is good enough and it was SO nice to have your step-by-step instructions in front of me so I wasn’t hurting my poor brain with trying to figure out how to go about creating without a pattern to follow, like I often do. So thank you!! Hoping the next one will turn out sharper.
I’m sure it looks great Marissa! And I’m so glad the tutorial helped. I’m sure the next one will be better, practice is always the key. 🙂
Blessings,
Cheryl